Technical note,
Installing RAM into Your iMac
Step 1: Shut down, and unplug all of the cables from the iMac, including the power cable. Step 2: Place a few towels on a flat surface. Make sure the towels are thick enough and cover a large enough area to accommodate the 27-inch display. Step 3: Gently place the iMac down on the ... <a title="Installing RAM into Your iMac" class="read-more" href="https://macinteract.com/installing-ram-into-your-imac/" aria-label="Read more about Installing RAM into Your iMac">Read more</a>
Step 1: Shut down, and unplug all of the cables from the iMac, including the power cable.
Step 2: Place a few towels on a flat surface. Make sure the towels are thick enough and cover a large enough area to accommodate the 27-inch display.
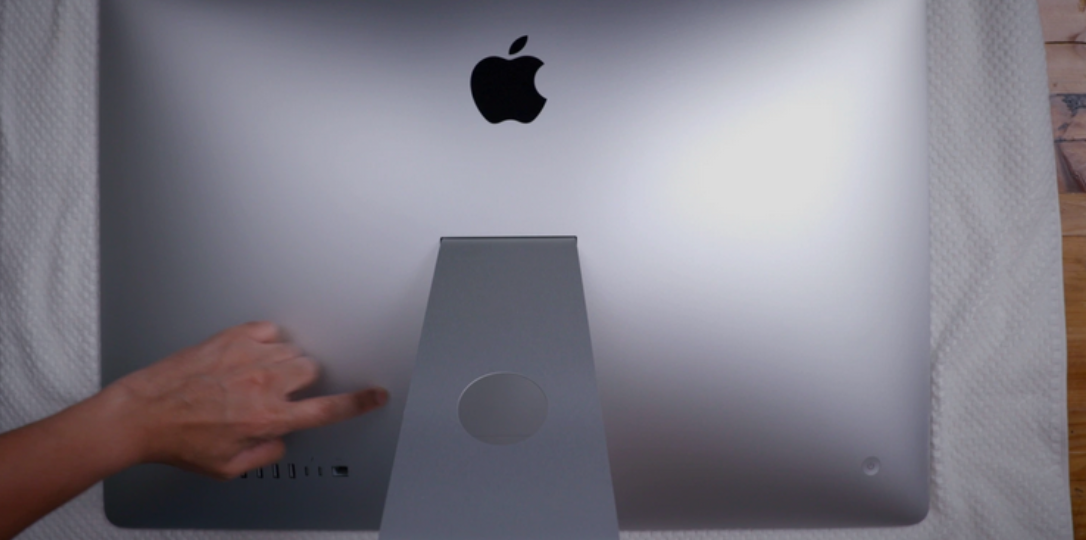
Step 3: Gently place the iMac down on the towels, with the display face down so that the rear of the machine is easily accessible. Ensure that you have enough working space.
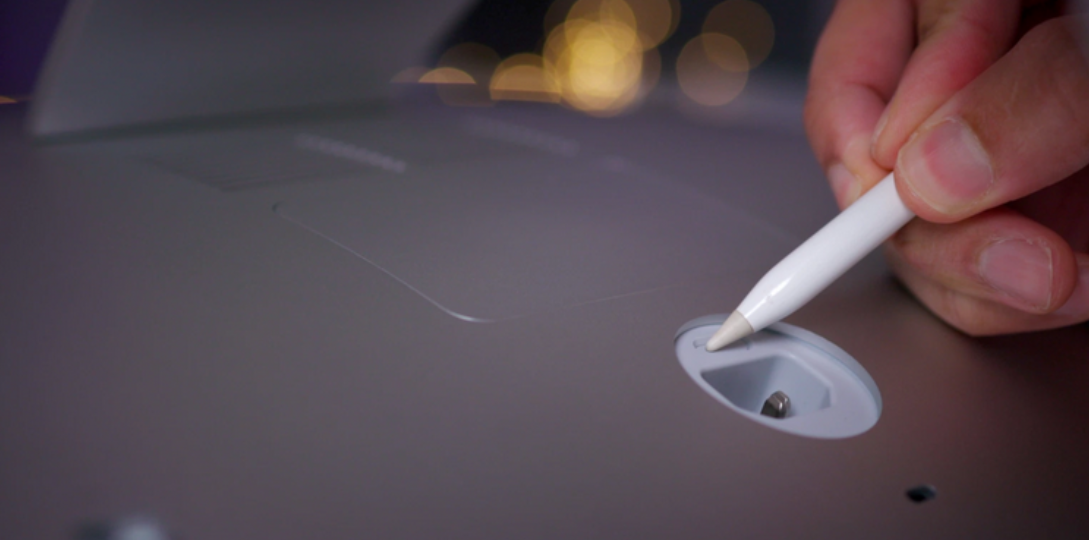
Step 4: Beneath the power socket, you’ll find a button used for ejecting the memory slot cover. Use a blunt object (I generally use an ink pen with the pen portion hidden) to press this button firmly, which will cause the memory slot cover to open. Remove the memory slot cover to expose the four SO-DIMM slots.

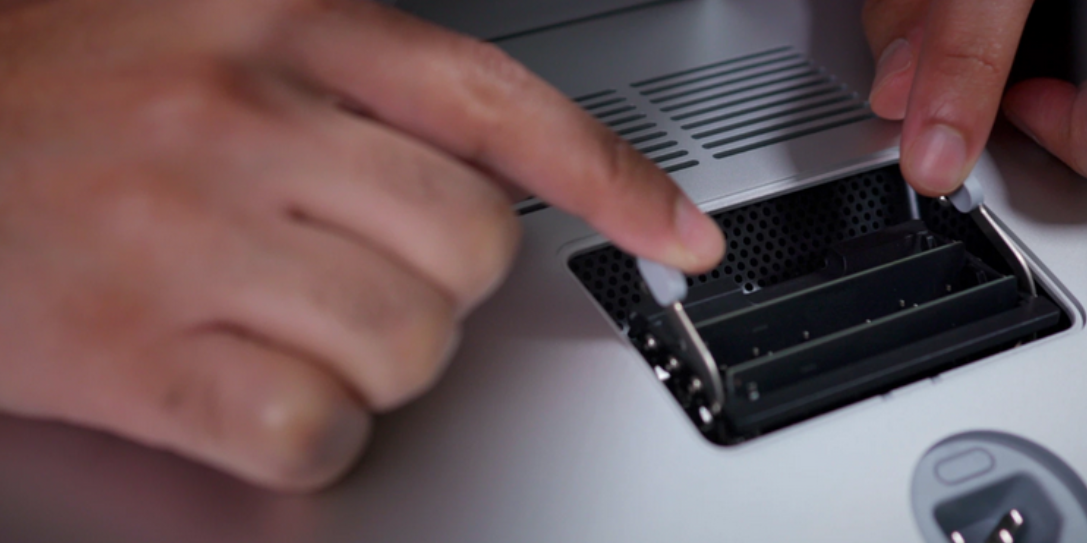
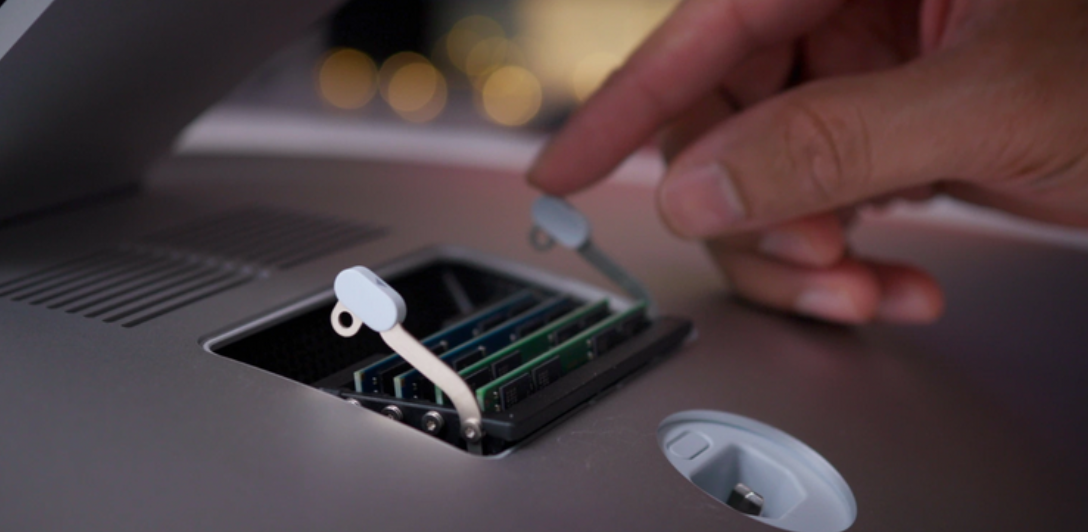
Step 5: Push the levers out to the edges of the iMac to unlock each of the SO-DIMM slots, and lift up each SO-DIMM module to remove it. IMPORTANT: Install 2x existing apple RAM modules in slots 1 and 2 and 2x new OWC RAM modules in slots 3 and 4. Be sure to insert all of the new modules with the notch facing to the left. Push each module straight down firmly into the slot so that it snaps into place. Double check to make sure the modules are installed correctly, and that the levers are locked back into place.
Step 6: Reinstall the RAM door by simply pressing it into place. The RAM door is secured via friction, so you’ll need to press firmly to reinstall it.
Step 7: Move your iMac back to your working area, connect all cables along with the power cable, and turn the machine back on. Don’t be alarmed if you see a black screen for an extended period — this indicates that the new memory is being initialized.
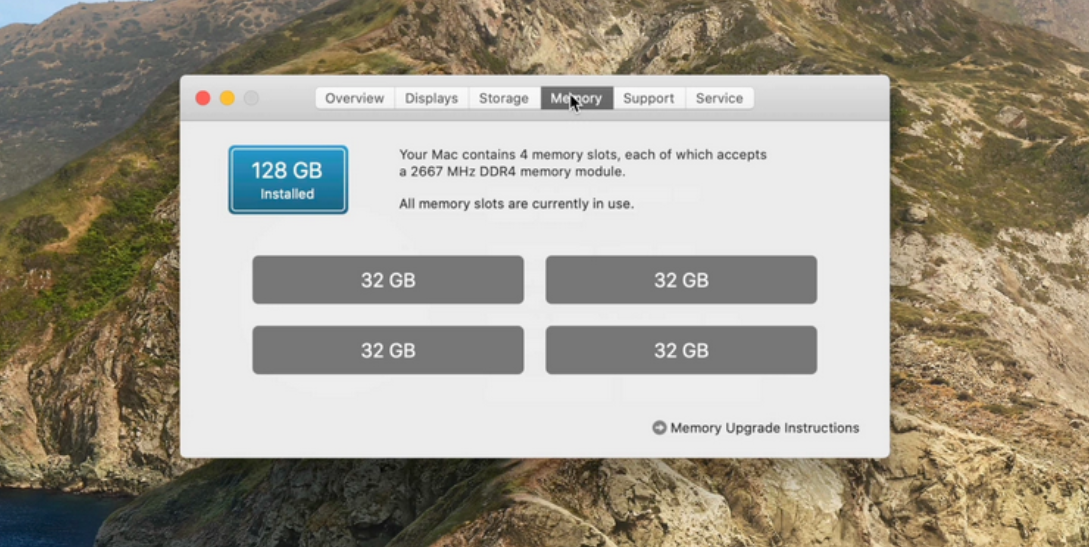
Step 8: Once macOS is back to the desktop, go to → About This Mac → Memory, and ensure that all of the installed memory is being accounted for and running at the right speed.